Friday 21 February 2014

Birthday Boy!

Yesterday it was Tom's birthday ... so 1st on the list when I got the chance to craft the other night was his birthday card!

I went for the new trusty favourite of Banner Blast and punch and teamed it with the 'See Ya Later' Sale-A-Bration set using the Birthday stamp in it for the wording in it ... as last year was a significant birthday!

As for the colouring ... well Yellow is Tom's favourite colour so that was at the starting point

 A quick dash downstairs to ask his favourite colours (well after yellow) and reply came purple ... well I'd decided it should be 'brights' colour family so colour number two was Rich Razzleberry, I only have cardstock in that colour and no stamp pad yet (but can see that will soon come as its a colour I'm loving in combination with lots of others). So out came the rectangle framelits for the main stamp and mat ... and the Festive piercing pack came out for a bit of embellishment. I tried with a needle orginally but found the SU paper piercer is worth buying as it fits the holes unlike my original non-SU one.. 


Then came in the third colour in my combo, Bermuda Bay for the banners to go top and bottom. I twisted some bakers twine I already had and gold thread to give a little glitzy finish to the hanging line as I didn't have any of the SU gold bakers twine which its lovely for a little sparkle on items.
The twine was lined up by placing the card design face down on the grid paper so I could line up where on the other end it needed to come in... Grid paper is so useful when trying to line up items or designing out items to give an idea of size. With the twine taped to the inside face I put in copier paper insert to hide the ends ... and used some of the left over banners to decorate. Then keeping the banner theme used the Happy Birthday banner from the hostess set.
...and the card was happily received on Thursday along with a Goldfrapp ticket for later in the year ... and Lego movie as the birthday treat (we are a Lego loving household ... Everything is Awesome!)

I think the Daffodil Delight and Bermuda Bay combination will be reappearing on some more of my papercrafts soon!

Tuesday 18 February 2014

SAB Banner time!

The storm on friday hit our coastline with a lot of force, so we have some damaged defences which means its been a busy week with the build up prep and the post storm actions/ works.

But tonight I got the chance to spend some time in the spare room crafting, first off Tom's birthday card for Thursday (that will appear here once the birthday boy has received it).

Once that was done it was onto the SAB Banner kit I'd been wanting to create. I'd decided it would go into our spare room (which also has the craft stash in) so I wanted a sleep/ welcoming phrase but with only 9 banners in the kit the words used took a while. I started with 'Good Night' but with the mix banner sizes and some larger letters that didn't work out... other phrases I came up with had 10 letters ... so asked Tom for a 9 letter phrase for the bedroom... he suggested 'Sleep well' which was close to some of phrases I had!

Some sponging with Pear Pizazz, Pool Party and Wisteria Wonder later and the banner was done, all pretty quickly! The letters are from the Banner Kit in the Autumn/ Winter catalogue (which will eventually get made into a banner for my neice and nephew's bedroom once I get the chance to sit down with my sister to make it up in colours the kids like/ go with their room).
Ta - Dah its up! Other than needing to swap the green e's around so I don't have two pointy banners next to each other! But its bedtime so that will get re-threaded later in the week when I get the time. But hopefully its the start of making the room a little more welcoming!

Sunday 9 February 2014

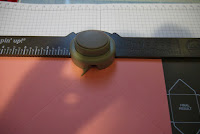
Boxes Galore using the SU Envelope Punch Board!

Back to the original box of my current flurry which started things off.
I wanted to create something that would combine to give people a free goodie on Sale-A-Bration when you spend £45 until the end of March. This combined the In Colour 2013-15 ink pad and card set and the Starburst Sayings bundle. For the walkthrough version I went for the same In Colour card and stamp pad set and worked out that with the Envelope Punch Board that would take you to Sale-A-Bration ... so chose to use the Sale-A-Bration 'Petal Parade' stamp set, as there is no sentiment with this set I used the Hostess Set 'Sweetly Framed' for the label stamping on the top of the box. Below is the end product...
Start with an 8"x8" square of card and score at 3" to start your first envelope.
Then using your longer end on the square, start to punch the second envelope that will make it into a box... cut in 1 score line all round to give you the flaps to make your box.
While it's flat, stamp your design. I went for each stamp on a different section of the box. I use tape for most things, for a better formed box put a strip along the score line of the flap.
Next to the band that will hold the box closed. I tend to use the offcut strips from making an 8"x8" square from a sheet of A4 card, so that's what we have here... although it needed a but more than 8" in length as its a smaller label so this one has a join underneath. Decorate as you wish and sort out your top label...
Now make up your box, gently make the folds to wrap your holding band around the box. Then crease these folds more so it forms the band. Then wrap around again with a bit of double sided tape at the end of your strip and lightly stick the tape to the underneath of the label, take it off and press down to secure the label on the band. Slip back on and ta-dah! Your box is complete.
You can also make little boxes for favours etc. from 6x6 starting squares with a starting envelope score at 2" for both envelopes or a tall box from a sheet of 8"x8" card and starting score of 2" for both envelopes.

Saturday 8 February 2014

So to the first craft sneek peek, a box made using the Stampin' Up envelope punch board. I bought it so I could make envelopes for little cards that I like to make but struggle to get envelopes... but after quarterly training where we used it to make a box, well it ran from there to this...
So tomorrow I'll take photo sequence so you can make your own boxes. This one is made using Island Indigo card, with Crushed Curry band. The stamp set is Starburst Sayings combined with the matching die set.
Time for a restart on this blog which never really got going, but with a new venture as Stampin' Up Demonstrator I feel its time to refresh and share my crafty moments via this blog.